Mock Up Your T-Shirt Designs and Make them Look Real
User Guide
Tutorial Video
Instructions
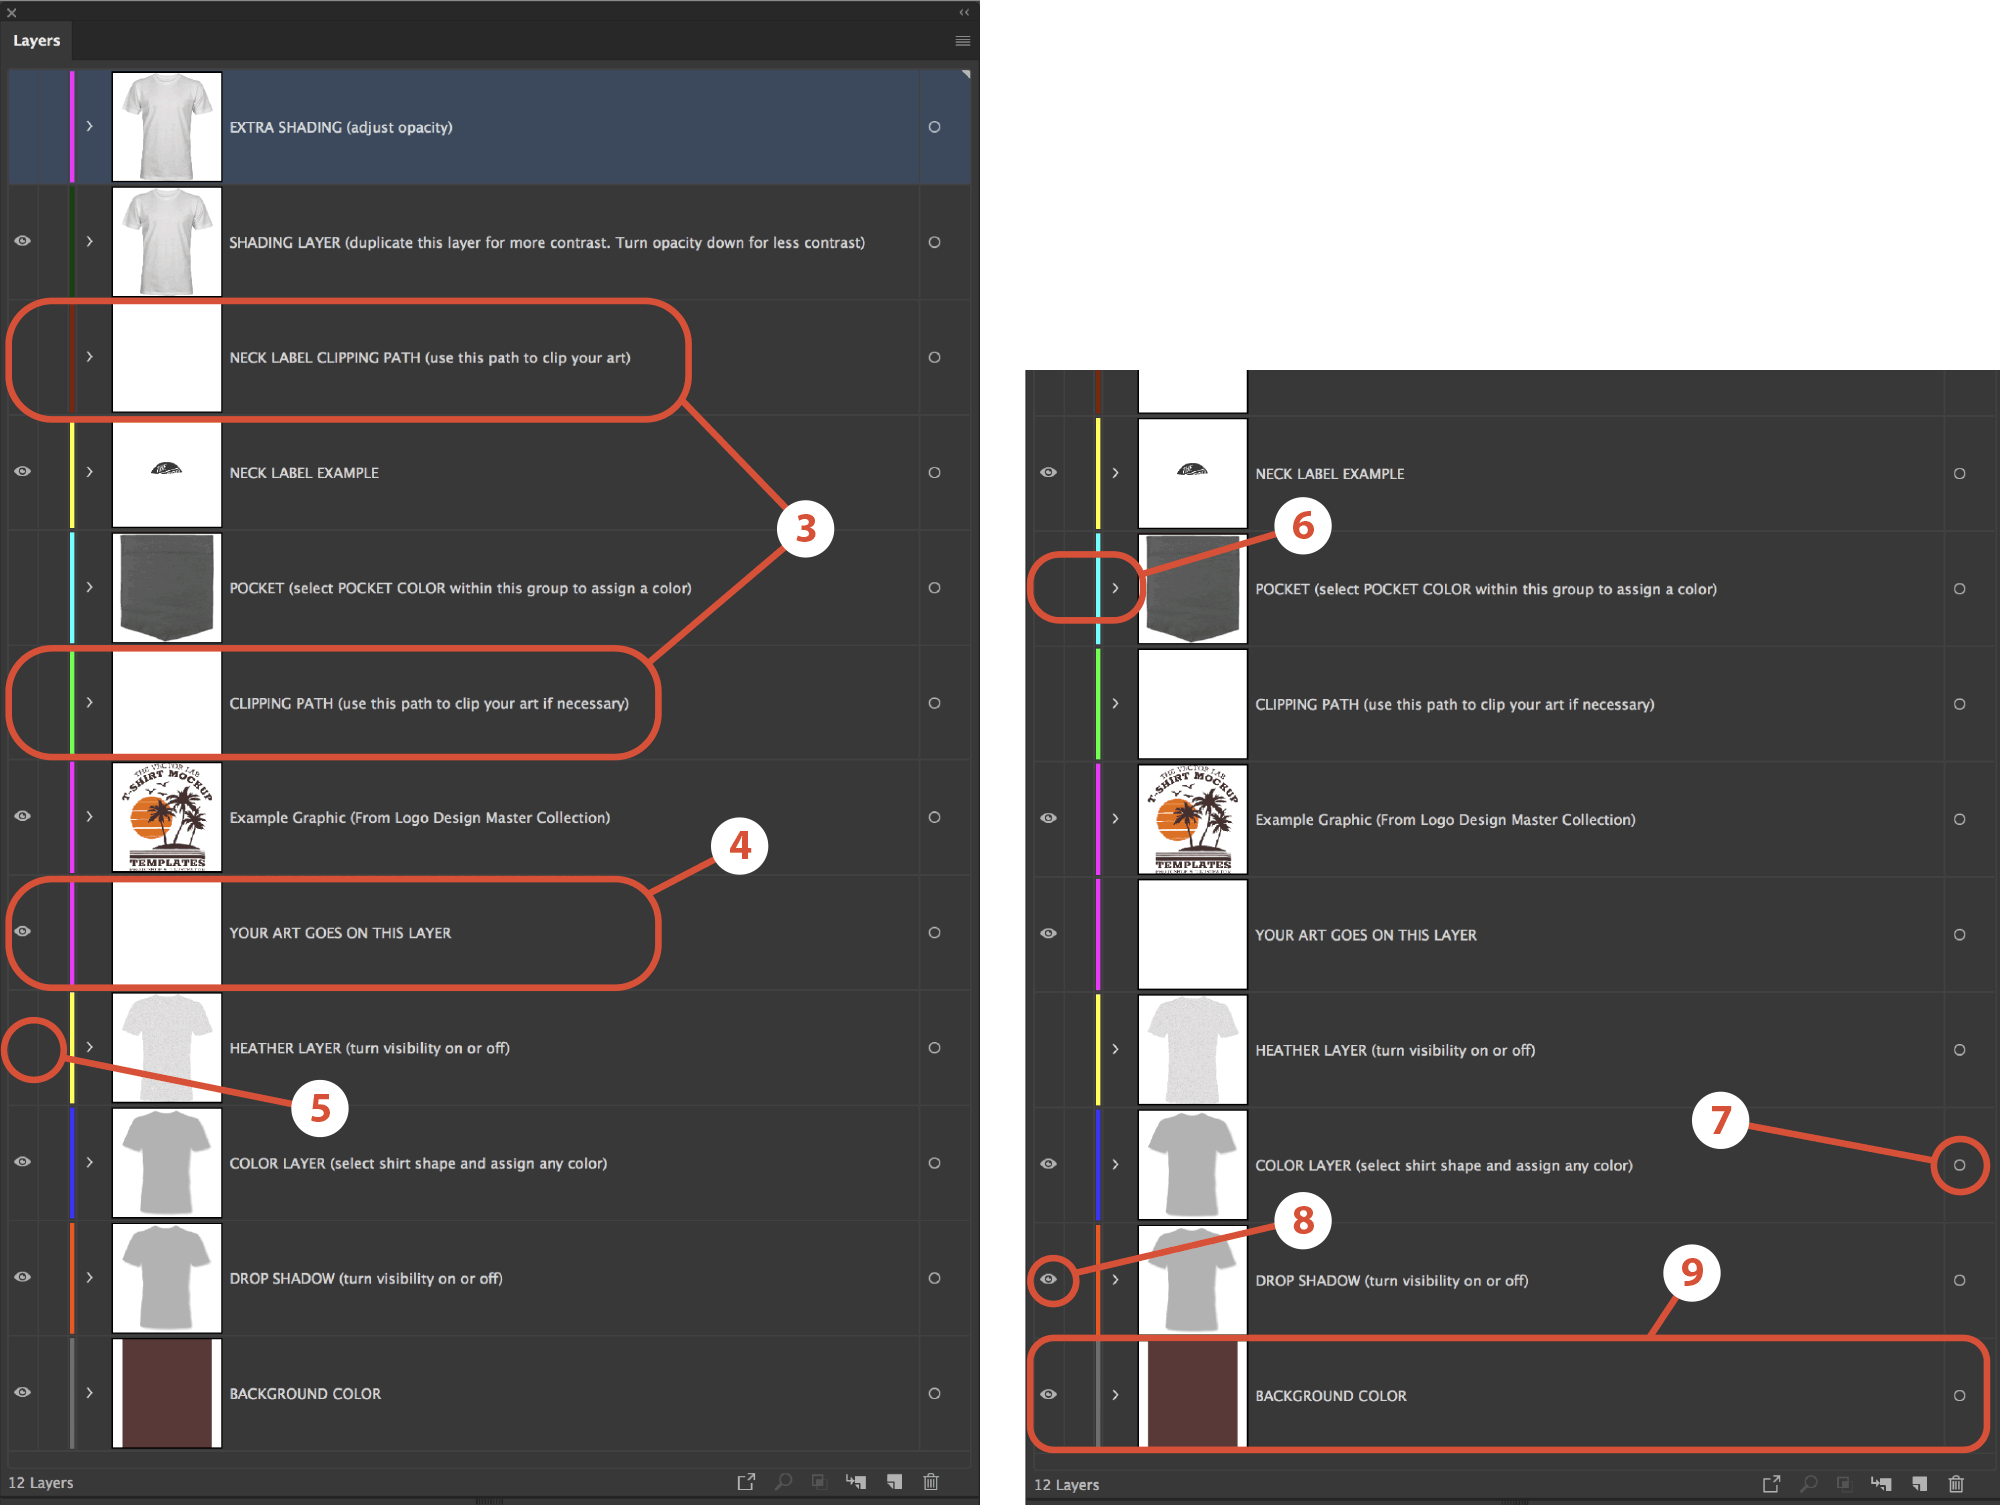
1) Open your LAYERS PANEL (Window > Layers). The easiest way to select objects in different layers is by clicking on these buttons in the LAYERS PANEL.
2) Turn on the visibility of the EXTRA SHADING layer (eyeball icon) if you want darker shading (especially if you are planning to mock up a dark color fabric. You can select the object in this layer and turn down the opacity of it in the TRANSPARENCY WINDOW (Window > Transparency)
3) Optional Clipping Paths: These are paths that you can use to clip out your neck label and off-placement t-shirt art. To make a clipping mask, make sure the path is above your art. Select the art + path. Then go to Object > Clipping Mask > Make.
4) Paste in art from another Illustrator or Photoshop file into this layer
5) Turn on the visibility of the HEATHER LAYER if you want to simulate a poly/cotton blend or a tri-blend fabric. You can select this heather object and adjust the opacity of it in the Transparency Window for more or less of an effect.
6) Click the dropdown arrow for the POCKET layer to reveal the pocket shading layer and the pocket color layer. Assign the pocket color object a new color to change it. Hide the visibility of the POCKET layer if you don’t want a pocket.
7) Assign the t-shirt shape in the COLOR LAYER to change your fabric color. You can even apply color swatches. If you want to make a black shirt, use a dark grey instead of 100% black (as shown in the video). You can turn on the Extra Shading layer (Step 2 above) to provide the dark shading for your shirt.
8) Turn on or off the visibility of the DROP SHADOW layer for a drop shadow effect.
9) Assign the BACKGROUND COLOR object any color. Or turn off the visibility of this layer if you want to export it as a PNG with a transparent background.
10) To export your file so that you can put it up on a website or social media, export it as JPEG or PNG format.


